Macromedia Flash 5 Session 1
September 17, 2001
an interesting example: <http://www.soh.nsw.gov.au/>
class examples
|
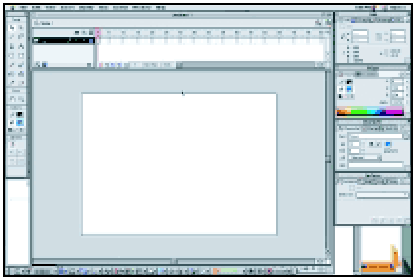
1. WINDOWS AND PANELS
Stage: Displays the active and visible segment of the timeline.
Timeline: Displays change over time and by layers
Toolbar: Control bar for creating and making graphics
View, Color, Options: Controls for stage items
Library: Stores reusable objects (symbols)
Panels can be closed, collapsed, dragged, grouped, resized, saved.
Panels and windows control listed under the WINDOWS menu item
Common panels are also found on the launch bar
|
2. DRAWING TOOLS
 |
Simple shapes: Lines, rectangles, ovals
Color selection tool for fill and stroke (eyedropper)
Tools with interesting options: Pencil tool, brush tool
The paint bucket tool paints: solids, gradients, and fills small
gaps
The ink bottle and stroke panel change the appearance
of lines
The eraser tool removes lines, etc; faucet modifier erases
quickly
The arrow tool selects and modifies strokes and fills
The select tool works with paths of strokes and fills
The pen tool creates paths
|
3. SYMBOLS
A reusable object; instances appear on stage and are portable across
MacroMedia
Symbols required for some types of flash interactivity
To make a symbol from an object or group of objects made in flash:
- Double click on the object.
- Select "INSERT >> Convert to Symbol.
- Assign a name and behavior
Symbols are stored in the Library (WINDOW)
Scaling and rotating instances does not affect the library
The effect panel changes tint, brightness, alpha layer, etc.
(EDIT: Edit Symbol) changes the instance, but not variations on the
instance
4. LAYERS
|
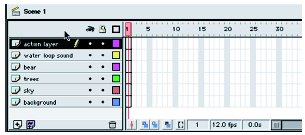
"Layers stack artwork like transparencies”
Selected layer are activated
Layers can be reordered
Layers added above active layer selected
The lock icon shows the layer but disables editing
The eye icon hides the layer and disables editing
The pencil icon indicates if the layer can be edited
The box icon filled shows the layer, empty shows a wireframe of the layer
|
5. TYPE
 Type can be added and manipulated as a shape or as a text field
"Create as you go" type has a circle
Text block with defined widths have a square in the upper right
Dragging the handle changes the width for either text style
Double clicking changes the type of text style
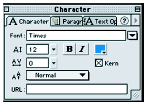
Character panel changes color, tracking, size, face, etc.
The arrow tool selects blocks of texts
6. BUTTONS

One of the first levels of interactivity
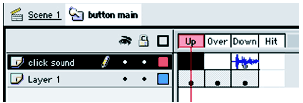
Button stages include up, down, over, and hit
"A button is a type of symbol with a special Timeline"
Right click (WIN) or control click (MAC) on a symbol to edit
Timeline and keyframe are introduced; more detail with "animation"
7. SOUND
Two types of sound: streaming and event
Streaming sounds play as long as the layer continues in the timeline
It stops when it reaches the last frame of the sound in the timeline.
To add sound to the layer, use the Sound panel
(Create a new layer and name it something meaningful; open the sound panel,
select event: streaming; create a frame in the frame number for the length of
the sound)
Event sounds play once started, no matter what happens
Event sounds are useful added to buttons or scene transitions
To add an event sound to a button place it in the down frame
of the event timeline
1. insert a layer in the timeframe
2. insert a keyframe at the down frame
3. Chose the sound from the library
4. Choose event from the sync menu
Once added to the symbol, every instance will now have the sound event
Flash does not work with every wave form (refer to the manual)
If MP3s are incorporated, recompress them before exporting
8. ANIMATION
Tweening is the basis of animation in flash
Tweening changes size, location, orientation, color and shape
Keyframes are the points on the timeline where important changes occur
Keyframes appear in the timeline as circles.
Keyframes w/ no graphics are empty or white circles
Tweening motion:
select the object to be moved.
when you perform the option INSERT >> Create Motion Tween, objects automatically
be turned into a symbol in the Library
In the active layer, a dotted line indicates an incomplete tween
Move the playback head to the desired end frame
A new keyframe for the end of the animation is added, and the solid line indicates
a successful tween
Test the movement using the control menu items
Tweening size and rotation (multiple keyframes)
Create a new keyframe at the point of change
Transform panel controls scale, skew and rotation
In area before new keyframe, perform INSERT >> Create Motion Tween
Perform a second modification back to 100 % at new keyframe
Tweening a motion path
Move to the first keyframe of the animation
Select the layer with the object to move and chose INSERT >> Motion Guide
Use the Pencil tool to draw a line
Select the layer to move and with the "Snap" modify on the Arrow tool,
move the object until a black ring appears (locks the object to the motion guide)
choose INSERT >> Create Motion Tween
Go to the last keyframe of the animation and snap the object to the other end
Double click the motion guide and select "Motion" from Frame Action
Tweening color
Use the effect panel to change color
Create your opening keyframe and terminating keyframe
select the symbol in the keyframe and choose MODIFY >> Instance
In the effect tab, select Tint
Shape Tweening
Similar to motion tweening, but YOU MUST use ungrouped graphics to tween shapes
FLASH CANNOT TWEEN THE SHAPE OF A GROUP OR A SYMBOL
Notice when you perform a shape change, the frame layer is a different color
Using Shape Hints demonstrates how to precisely control how a shape changes
from start to finish


 Type can be added and manipulated as a shape or as a text field