SCRAPPED >> SIGNIFICANCE: a stool
for my final disruptive technologies project, i chose to continue investigating efficient design through the concepts of mass-production and the use of "garbage" to create an object of significance. however, this time i traded in scrap cardboard for scrap wood and - as a consequence - i traded the laser cutter for wood working tools. i made the trade from cardboard to wood because wood is also commonly wasted but it has a much longer life span.
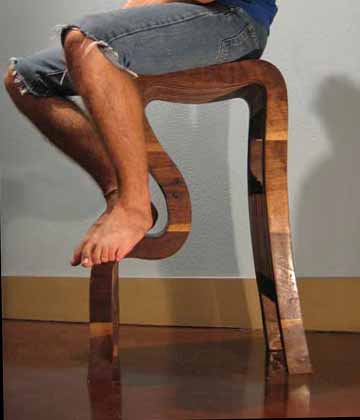
i constructed a stool with the wood scraps i collected. there is no deep reasoning behind that choice... i just wanted to build a stool. here's what i ended up with.
**for more information on how this stool was made, feel free to scroll down and explore the process.
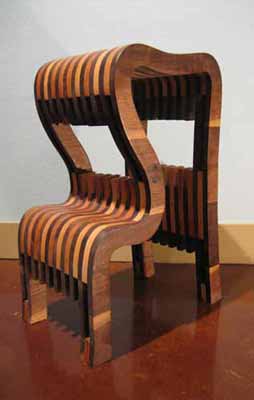 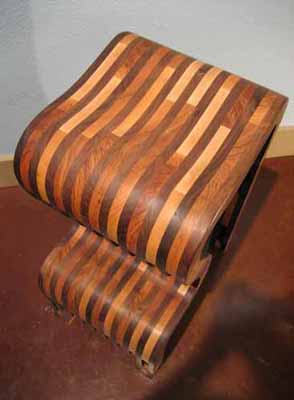 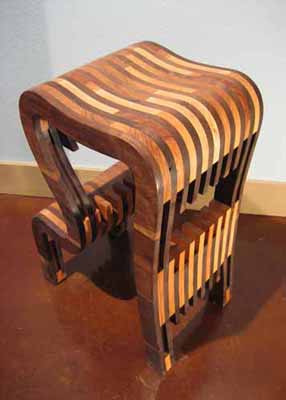
the building process:
a) collect scraps. i began the process by searching dumpsters at local millwork companies.
i was surprised at the how much salvagable solid wood that i was able to find.

b) mill. the next step was to mill all of the scraps to the same thickness. i did this by using a
jointer (to flatten out one face on each board) followed by a planer (to make the opposite face
exactly parallel to the jointed one). after the two faces were parallel, i ran the pieces through the
table saw to get nice flat edges on the boards.

c) glue. now that the boards can lay flush to one another, they can easily be glued together
to create a large, flat surface. although one's initial thoughts on the durability of the glue joint may
be a bit sceptical, it turns out to be incredibly strong. a long grain-to-long grain glue joint (as shown
above) is actually stonger than the wood itself.

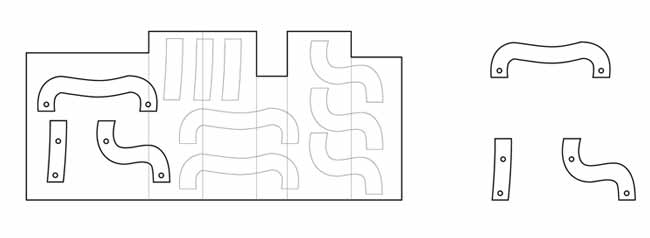
d) cut. i first made templates of the stool's seven basic shapes. the templates are made
of thin sheets of masonite which i laser cut. after the templates were made, i repeatedly cut
(MASS PRODUCED) these seven basic shapes out of my wood surfaces (using a band saw followed by a pin router).
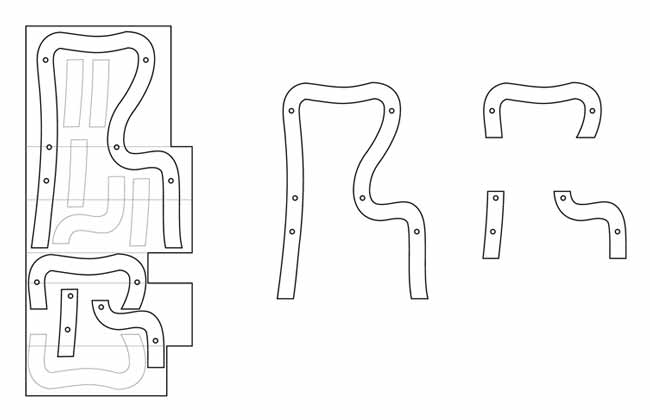
**the drawing above illustrates the four templates used for the dark wood and the drawing below
illustrates the three templates used for the lighter wood.
assembly:
i ran dowells through registry points that were consistant throughout the individual pieces of the stool so that they would be perfectly in-line when i glued them together.
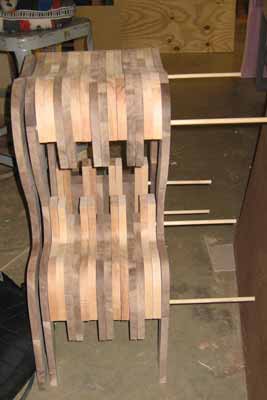 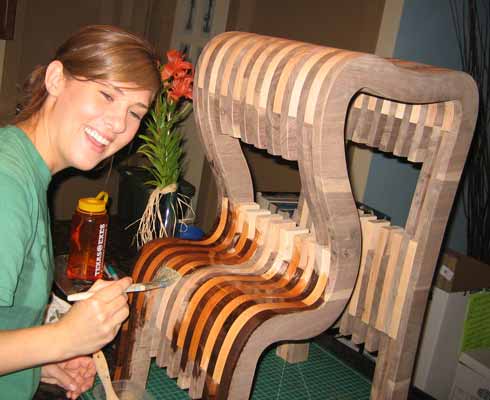
once i played around with different arrangement options (the image above does not reflect my chosen arrangement), i was ready to glue the indiviual pieces together. this was very simple - i just painted glue on both faces of each piece and clamped the pieces together. after the pieces were glued together, i sanded and sanded and sanded the stool until it was smooth. once smooth, i finished it with tung oil.
results:
i now have a sleek looking stool made from "garbage".
[BACK TO TOP]
|