|
Flash Exercises:
|
|
Animating in Flash
Animation in Flash is easy! Let's look at a couple of different
ways to achieve animation in Flash.
We built tweens in the “Button and Symbols making" tutorial,
but let's do a quick review.
Shape Tween
- Draw a shape at frame 1.(Try a simple shape, like a heart.)
- Insert a blank keyframe at frame 30 in the Timeline. Draw another
shape (like a star) in a different color at frame 30. The two shapes
should be on the same layer. Click on the area between the two frames
in the Timeline. The area will turn black.
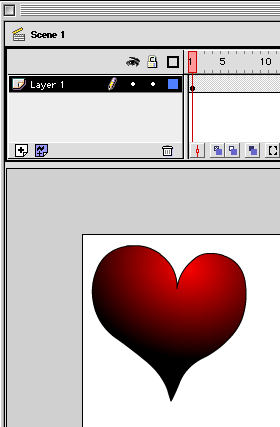
- Now, open the Frames panel and choose Shape Tween. A light green bar
with a solid arrow will appear between the two frames. When you scrub
back and forth in the Timeline, the heart morphs to the star, and changes
color.

- See Example 6 in the Flash
Examples section of this tutorial for a finished product.
Motion Tween
- Create a symbol or pull one out of the Library onto a new layer on
frame 1.
- Insert a keyframe at frame 30. This will keep the symbol on frame
30.
- Modify the symbol by changing the position, scale, rotation, and alpha.
(Use the Effects panel for the alpha). Select the area between the frames
on the timeline and it will turn black.
- Open the Frames Panel and choose Motion Tween. A light blue bar with
a solid arrow will appear between the two frames. When you scrub back
and forth in the Timeline, the symbol will move, scale, rotate and the
alpha will change.
- Motion Tween has other options. You can choose the direction of the
rotation from the pull-down menu in the Frames Panel and have the tween
automatically rotate the object the number of times you specify.
- See Example 7 in the Flash
Examples section of this tutorial for a finished product.
Animations can be reused. For example, let's say you create an animation
in a movie symbol of a bouncing ball. You could pull that ball out of the
Library as many times as your computer can handle. You can put them all
on independent layers, animate the position, scale, tint, alpha, etc.
Animating along a Path
Let's say you want a small airplane to follow a path from the ground
up to the clouds.
- Create a movie symbol of a little airplane with an animated propeller.
- Drag the symbol out onto the stage. You may want to add a runway and
some clouds in the sky to make your animation more complete.
- Select the airplane layer and from the Insert menu, choose
Motion Guide. This creates a new layer called a Guide Layer on
top of the airplane layer.
- Insert another keyframe in the Guide:airplane layer at the point where
you want the motion to stop.
- Using the Pencil tool, draw a curve that you want the airplane to
follow from the runway to the clouds. (It won't show up in the
movie)
- Select the first keyframe in the airplane layer. Select the Arrow
tool and move the airplane to the beginning of the curve.
- Now select the last keyframe. Move the airplane along the curve to
the end of the curve.
- Double-click the first keyframe to open the Frame panel. Choose Motion
from the Tweening menu and check Snap (snaps the registration point
to the path).
- Scrub along the Timeline, and the airplane will follow the curve from
first to last frame. When you publish, the plane's propellers will
move. (Movie animations do not display in Flash on the stage.)
- See Example 8
in the Flash Examples section of this tutorial
for a finished product.
This is the most file-size intensive method, but sometimes it's
the only way to get the effect you want. You can turn on a nifty feature
called Onion Skinning to see surrounding frames so you can more accurately
draw your frame.

Exercise:
- In frame one, draw a smiley face but with no mouth. (We'll add it
in a minute.)
- In frame four or five, from the Insert menu, choose Keyframe.
This copies the smiley face from frame one through frame four or five.
- Insert a new layer above the smiley face layer. You can call it "mouth."
- Draw the smiley mouth on the smiley face.
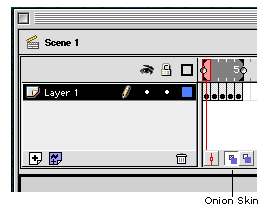
- Click on the Onion Skin icon from the options under the Timeline.
You will see a faded version of the first frame.
- In frame two, draw another mouth on top of the faded version of frame
one. Make the curve of the mouth a little straighter.

- Continue to do this for another few frames.
- Turn off the Onion Skin button.
- Now scrub through your animation. The smiley face loses its smile…
oh, too bad!
- See Example 9 in the Flash
Examples section of this tutorial for a finished product.
|
